When Craig and Caz approached me to put an article together on tips for improving travel photography, I have to say I was flattered.
I love taking photos, and to be asked to share my thoughts on how travelers can get the best from their camera was a wonderful opportunity.
Of course, as soon as I was asked, my head started whirling. Photography isn’t a small subject. Craig and Caz cater to a diverse audience. Putting out an article that covers everything at the right level was clearly going to be a challenge.
With this in mind, I decided to split the article into two. This first post will be covering the practical side of photography, with tips and ideas for composition and dealing with different subject matters.
The second post will cover things like photography equipment, a basic overview of photography jargon, and getting the best out of your photos with digital editing tools.

As this article is specifically aimed at improving travel photography, it is not going to go into too much detail on the technical side of photography.
I will cover some jargon which is essential, but for more detail on how a camera works see my article on the differences between an SLR camera and a point and shoot.
Enough with the introduction. Let’s get on with this first article…
The Real Basics of travel photography
Photography and travel go hand in hand. In today’s article I plan to give you a few handy hints that you can use to improve your travel photography.
As well as the memories you’ve captured, with any luck, you’ll get back from your trip and people will be clamoring to see your shots.
Focus
This may seem obvious, but ensuring your shot is properly in focus is vital. Your camera will most likely do the focusing for you – but before you press the shutter button, make sure that it is focusing on what you want it to.

Most cameras will allow you to set the focus point manually, so if your camera isn’t playing ball, don’t be afraid to override it. There is nothing worse than a perfect shot ruined by incorrect focus.
After you have taken your shot you should review it on your cameras screen, but bear in mind that the small screen may not be the best way to see what is in and out of focus, so if in doubt, and if possible – take the shot again.
Lighting
Poor lighting can ruin a shot. From a subject which is entirely in the dark against a brightly lit background, to poor definition on a landscape shot due to an overly bright sky, the end result is the same: shots which aren’t worth the digital memory they take up.
Your camera will usually do its best to work out the lighting in a scene for you, but the mechanics of a camera are no match for the capabilities of a human eye, so as with the focus, don’t be afraid to override it if you can.
Most cameras allow you to under or over expose fairly easily, as well as change the white balance setting for different situations.
Shooting in the early morning or late afternoon will give better light, and avoid shooting towards the sun unless that is the effect you are trying to achieve. If necessary, force the cameras flash to on to illuminate a darkened subject.

Just before you hit the button
Before you commit to taking the shot, run through some checks in your mind. Is everything you want to shoot in frame? Is the horizon level? Is your camera set to the right mode / ISO setting? Is your thumb over the lens / flash?
These may seem obvious, but failing to capture the moment because your camera was on “M” mode from that last long exposure you took – or having your thumb over the lens – is a really frustrating and yet somehow commonplace occurrence.
And don’t get me started on the ruination of an otherwise great picture as a result of an imbalanced horizon. Two seconds of checking before you take the shot can improve the result no end!
Know your subject
What you are shooting affects how you compose your shot. Here are some common subjects and ideas for shooting them:
People
If you are shooting a person, a handy tip is not to frame them in the center of the shot – try placing them off center. If you have control over how much of the shot is in focus, known as depth of field,manipulate this. On a digital SLR you do this by changing the aperture so as to bring out the subject and reduce emphasis on the background.
When shooting people, get them to pose for the camera, not for the photographer. This should result in more natural poses. Alternatively, shoot them when they are not paying attention for more natural looking shots – but be sure to let them know afterward!
Animals
If you’re shooting animals, get down to their level so as not to make them appear dwarfed. Consider using a telephoto lens to get up close and personal, or if you are shooting on the tiny scale of insects, use a macro lens.

Landscapes
If you are shooting landscapes, go for nice wide shots. Pay particular attention to what is in the foreground and background of your shots. Consider how the different pieces of the image work together. Find something like a hut or a road when shooting large scenes, to help convey a sense of scale, and to draw the viewers eye through the shot.
Landmarks
When shooting popular sites, try for something different. Many thousands of people will have already shot the scene from the same places – if you want to intrigue your viewers then you will need to do a bit more work. Try different angles, or picking out details that others may have missed.
This said – don’t forget to take the classic tourist shots as well. Photography is a record of where you have been and what you have seen, and you’ll want those memories later on, even if you only show them to yourself.

Composition techniques
Photography is an art, and like any art form, there are a number of rules that you can follow (or spectacularly ignore) to improve your work. The human eye is drawn to various patterns and prefers certain image compositions over others. Here are some of the basic composition techniques that you should be aware of:
The rule of thirds
The rule of thirds is one of the easiest and most important of the composition techniques. The idea is fairly simple: imagine a grid over your image like a tic tac toe (or noughts and crosses) board, which divides your image into thirds.
When composing a shot divide the parts of the image into thirds to fit into this grid. So if you are taking a shot of a beach and some sky, the image would be divided horizontally, with the bottom third being beach, and the top two thirds being sky.
This will result in a far more pleasing image than just splitting the shot half and half.
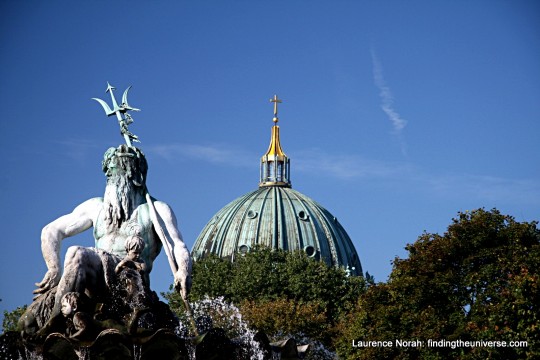
Framing
Framing is a technique that focuses the viewers eye on the subject you are capturing. The idea is to create a picture frame effect from natural objects around the subject of your shot.

Frames can be found in all sorts of places, from natural frames (think tree branches, or rock arches) to man made frames (scaffolding, windows, and so on). The list of possibilities is almost endless, and can result in some eye catching and unusual photography.
Depth of Field
As was briefly mentioned under photographing people, controlling the parts of the shot that are in focus is a great way to emphasise your subject. Controlling depth of field is done by manipulating the camera’s aperture. More on that in my depth of field article
This may not be possible on a point and shoot camera – but can be achieved on a digital SLR with either the Av or M modes.
All of the above techniques can be combined to achieve different results.
Well, that is pretty much it for the first post. The second post, which will be published soon, will focus on photography equipment, getting the best from your shots with simple digital editing tricks, and an overview of photography jargon.
Until then, if you have any questions, let me know in the comments below!
Laurence Norah has been exploring the world for many years and is currently based in New Zealand. He shares his photography tips and travel stories on Finding the Universe. You can also follow his updates via twitter and hang out on his facebook page.
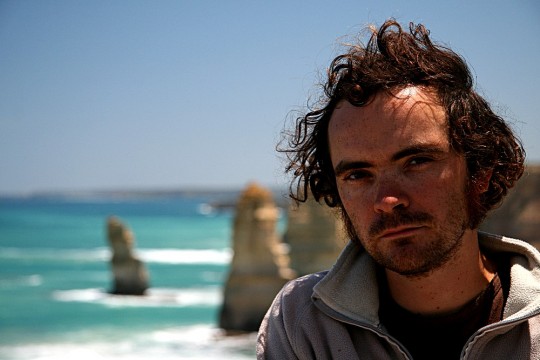
Who is the rakishly handsome subject of the portrait example?
I actually learned a lot about photography Loz even with my small portable camera.
Adam…great question! Please reveal yourself mystery man ha ha…
I love it! Looking forward to part two. Off to read your depth of field article as that is what I want to know more about
Hey Natalie…We are looking forward to part two also. Laurence has some great advice!
Thanks Natalie! Hope you find something that helps 🙂
Fantastic tips! I love taking great shots and have done a few here and there. Now that we have a nice camera to use I am more interested in photography so these are great to keep in mind. I think someone has to have an eye for stuff first of all and the tips will help them make those shots even better.
Hey Jeremy – Our interest has grown a lot too since the purchase of our new camera. Have fun experimenting!
Thanks for the comment Jeremy. The eye comes with practice – the more photos you take the more you learn about what works and what doesn’t. But hopefully al these tips will help 🙂
Candid shots of people is exciting because you could get their real emotions. Talking to your subjects before taking photos is also a great strategy to get them warmed up and come out with more natural expressions.
Hi Julie…absolutely, it’s always great to get natural expressions and their real emotions.
One of the best piece of advice I ever got was take the photo and then turn 180 degree and take a shot of whatever is there.
You’d be amazed at what you missed.
Hi Ayngelina…interesting strategy. Might give it a go!
Good tip Ayngelina. Reminds me of some puzzles I once saw, where the picture on the box was the scene 180 degrees opposite to the actual puzzle.
Thanks, I desperately need this instruction 🙂 Good tip about adding scale to landscape shots by including something in the foreground… and the tip about animals is something I wouldn’t have thought of.
Hey Scott…yes we got value out of these tips tips from Laurence. Good luck with your photos from here out.
Really great piece on beginner tips (and nice photos too!) I’m really working on improving my photography this year and always like to be reminded of these basics!
Hi Andrea…Glad you learnt something. Have fun putting the tips into practice!
Thanks Andrea 🙂
What a great post! Great pics! Sometime’s I’m in such a hurry to take a shot because I think the moment will be gone. I don’t really stop to think about all the little things of what I am actually capturing. These tips will help me slow down and process what I’m taking a picture of. Thanks for all the awesome photography tips.
Hi Juliette – I think that’s a great comment, to slow down and process more of what’s going on!
Thanks Juliette, much appreciated 🙂
Interesting!
i like the landmark advice. if you are going to take the same shot, you may as well just buy a postcard. nice post, looking forward to part 2!
Cheers Jamie 🙂 Part 2 will follow soon!
Great tips– thanks for sharing!
These tips are a good refresher and they never grow old – as an avid photographer myself, I usually need a refresher or 2, but we just have to remember them when we take the picture!
It was the best portrait photo I had to hand, and yes, of a devilishly handsome chap, if somewhat on the hirsute side at the time of photography 😉
I am even hairier at the moment. Not as wind swept though. 🙂
I cannot tell you how many times I have clicked the button only to realize I still had my camera set on ISO800 or a long exposure. And then you’ve missed your shot. It seems obvious, but it is the little things that make the most difference, and we all need the reminder.
I am really looking forward to this series on Travel Photography! I hope to learn a thing or two 😉 thanks for the great tips so far.
Excellent job of summing up the basics!
Great advice here – I have shared this on our Facebook page.
cheers
Tristan
Thanks very much – I’m new to the travel blogging scene and was asked by my company to write a blog with photos for a trip we are about to go on. Following this advice will be sure to please, thank you!
Great tips! I’m headed to Belize to try some of them out! Ever been?